Friday 19 September 2008

LEGO Photography 101 - Week 2

Week Two: LIGHT.

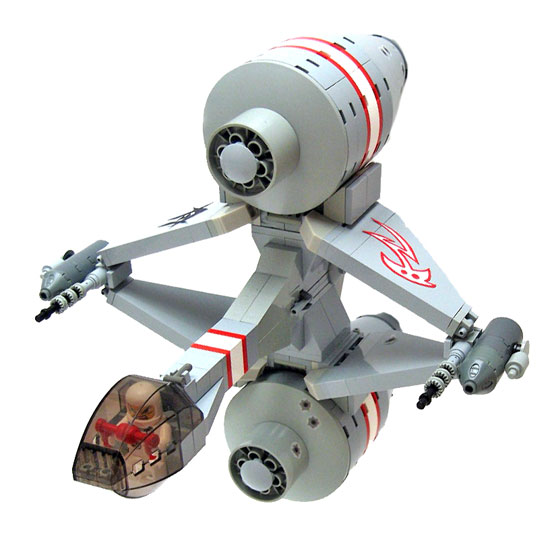
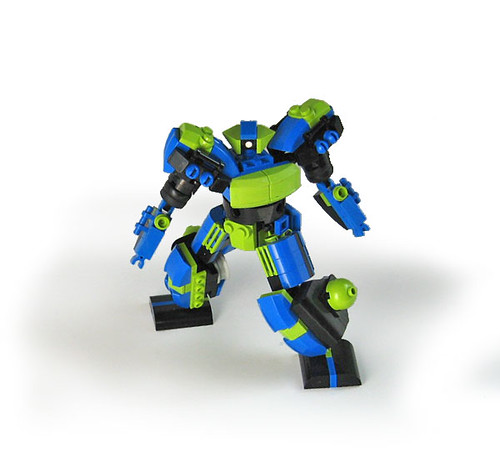
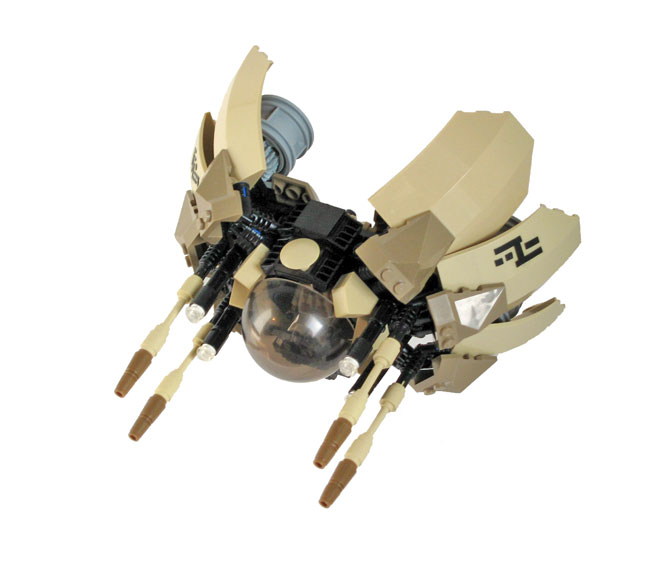
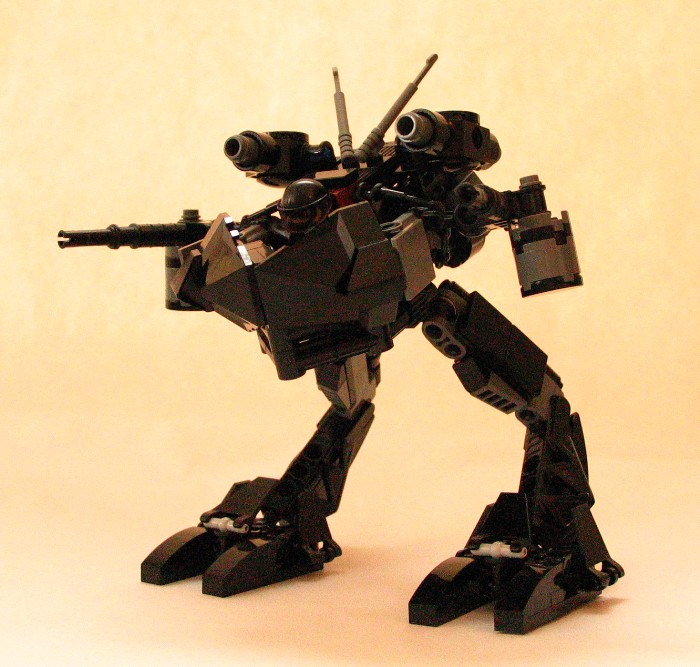
It cannot be stressed enough to the importance light has to photography. Photo = Light, in the Greek. Forget about your subject, it is just a coincidence in the scene of Light you are capturing. If you photograph LEGO in a dark and dank basement, then this week's lecture is for you. Today I'm going to touch on the importance of light to photographing LEGO models, and how you can harness it sufficiently to aid in giving you great LEGO photographs.

Firstly we must consider the application for which the photographs are destined. Taking shots of your LEGO creations must display as much detail as possible, true colours, and depth. This week I'll only touch on the first and second. Detail is very key, the photos need to look nice but foremost must provide a full capture of the model. With this knowledge in hand we can determine the type of light which will best suit us. Direct light is out. Much too harsh, and creates distinct and deep shadows. You need diffuse light, or in layman's terms, a large light source. What qualifies as a large light source? A cloudy day, a light tent or light box, window light (and this is specific, so wait), or reflected light.
An overcast day is the easiest as it requires very little work from you, however, you're really dependent on the weather. If you want to take this route - remember that the heavier the overcast the less shadow you will have. You'll also probably end up with dull colours that must be punched up in post-editing.
A light tent or a light box is about as fancy as you can get. You'll need a cardboard box, a box cutter, some box tape, and some form of half-opaque/half-transparent paper (e.g.: tissue, wax, parchment, etc.). Then go here and follow the instructions. This should cost you next to nothing. From here, you can take a direct light source, like an off camera flash, a lamp, or direct sun and make it into a diffuse source by shining it through the semi-transparent paper. The all white interior will also help bounce around stray light and reduce directional shadows. For the purposes of LEGO photography, the more lights the better - however, watch that you avoid mixing different types of lights and I'll get into this latter in the post (WHITE BALANCE).
Lastly we come to window light. When referred to as a photographic light source, it means specifically diffuse light from a window - not direct sun. So you'll need an overcast day, or a window facing North (if you live in the Northern Hemisphere) or South (for those in the Southern Hemisphere) - this position will avoid direct sun all year round. Additionally with this light source you must make use of a reflector to bounce back light and reduce shadows. Ideally you place your model at the far side of a window (from yourself), so imagine: (you)--window--(model). Then get the reflector right beside you pointing at the model, and get it as close as possible to the model - if it isn't in your way it isn't close enough. More on reflectors to come.
With options 1 and 3, you will need a backdrop. White bristol board will do excellently, depending on the size of your model, larger SHIP size creations might require a bedspread. Curve your backdrop, from a vertical surface to a horizontal one, to eliminate the background. Use the matte side of the board, you'll want to avoid the possible problems glare might pose with the glossy side. White is best. Once you are comfortable shooting on white, begin experimenting with different colours, darker drops help with darker models, and coloured drops can spark visual contrast (Tim Z, Spook, is good with this). However, avoid coloured backdrops until you understand White Balance. If you are using something larger than bristol board, look for something with a fine texture: bed sheets are good, bath towels bad - get the idea?
Reflectors can be had just as easily. They MUST be white, for the intents and purposes of photographing LEGO. Foam core, canvas boards, bristol board, illustration board, white cardboard, you see where I'm going. As mentioned above, if you are using a reflector, it must be VERY, VERY close. Light falls off very quickly from them, and an extra 10cm can make or break your shadows.
White Balance. O muse, help me through this one. Some of you are aware that different light has different colour casts to it, even though its 'white'. Our eyes to a pretty good job of auto adjusting and we don't notice it all that much. However, take a photo with a daylight white balance with incandescent bulbs and you'll understand how important this is. White Balance is all about getting neutral whites, without any colour cast. Cameras are able to adjust to specific temperatures of colour to neutralize whites, but only one at a time. What this means is that if you start mixing daylight with lightbulbs, incandescent with flourescent, you aren't going to be able to fix your colour cast without some intense and impressive photoshop maneuvering. So don't. Flash = Daylight. For more info on Colour Temperature see wikipedia: [link]. Do yourself a favour, stick to one light colour, set your camera accordingly, and be merry.

Okay, I've done all you said, but my photos are all grey!

18% grey. What? Okay, here's the deal. Computers level tone from 0 (black) to 255 (white) with 8-bit colour. Value #128 is also known as 18% grey. Camera light meters read scenes and expose to achieve an average of 18% grey, because generally this works. Experiment: shoot a white piece of paper (as the only thing in frame) on your camera's auto setting with ample light, and it will still come out grey. So when you photograph with a white backdrop your camera wants to make that 18% grey. Solutions? Either in manual exposure, or with exposure compensation you can 'overexpose' (by your cameras meter) until you actually get a proper exposure. Alternatively, if you can lock your exposure (as in, set it on something and then keep it set the same even while photographing something entirely different), make a large wall of dark grey bricks and give it ample light, then fill your frame with it and take an exposure reading. Dark grey is probably fairly close to 18% grey. Try it, and shift either way until your exposure is proper.
Note that if you are using a dark backdrop, like black per se, your camera will try and overexpose to make that black grey. Learn to know what you camera is doing and act accordingly.


I hope that all wasn't too much to take. If you're lost, read through it again, slower around the parts that confuse you and use google to do some more research. Once you get your head around it, it isn't hard and you'll wonder how you managed to conjure up half-decent shots before. Next week I'm going to move on to the taking of the photos, shutter speeds, apertures and tripods galore!

Saturday 6 September 2008

LEGO Photography 101 - Week 1

With this post, I'm going to start a series named "LEGO Photography 101". The objective of this series is to provide in-depth tips on how one should best photograph their LEGO creations. As Lukas helped to explain, photography is VITAL function of presenting your creations online, and the best photography will give the model the best response it can get.
How hard is it to achieve great photographs? Not very. There is a little bit of work involved, but as you're spending the time to build your models in the first place, a little effort for photography isn't much to ask for. How expensive is it? You probably have all you need already.
In order to provide in-depth tips, I am doing this as a series and each week (hopefully) I'll post an article relating to only one part of the process. There are many guides available at most forums that are all-in-one stop shops, so if you're completely lost on LEGO photography you may want to use one of those as your main education and treat this as additional help. 

Week 1 : Is my camera good enough?

With the digital revolution well established, the choice of camera has become an even more complicated process than before. Back in the glory days of film, a camera was only as good as the film put in it. This is probably why film cameras have a longer life span than digital, there was just much less to them. This also presented you with a very large selection of results depending on the type of film you may have used. With digital many users are prone to taking the pictures straight from the camera and doing nothing to them. While they may view this along the same lines as not editing prints they got from film, one must consider that your digital camera only has one sensor and the number of ways that sensor can capture colours differently is severely limited. I can't imagine using the same film all the time, therefore I can't imagine not doing some sort of processing to my digital images!
Anyways, getting back on topic, with the limitation the above mentioned one must be careful when purchasing a digital camera. Your first big decision will be between a Point & Shoot or a DSLR. You're not training to become professionals, so a Point & Shoot will do the average LEGO builder fine, therefore, I'm going to focus first on the Point & Shoots and then touch base a little with DSLRs later on.
With a point and shoot you have one lens, so you better make sure you've got good quality optics! It all really depends on what else you may be using the camera for but consider the following: large zooms will not give you as sharp photos as smaller zooms, there will just be more glass in there; watch for "optical zoom" and "digital zoom", the former means that the lens is actually moving to zoom in and the latter means that the camera is just cropping the image - the former is thus much preferable, digital zoom is a cheap gimmick best avoided.
For photographing LEGO there are some key features you want: Exposure Compensation and White Balance. Aside from those, you won't NEED any other controls. Many Point & Shoots might not have specific White Balance Control, but will have different shooting modes (indoors, outdoors, night, snow, etc.) that are set with different white balances - if your camera has these, experiment and see which one gives you the most neutral whites when photographing your LEGO models. Don't get carried away with Megapixels, and don't choose one camera over another because it has more. The actual image sensor on a Point & Shoot is much smaller than 35mm film and it is the size of the sensor that matter more than how many Megapixels you have. 6 will do fine. Anything more, and your just trying to see how many people you can cram into a phonebooth. Bad idea. You're just going to end up with more noise/grain.
Marco is an excellent feature present on many Point & Shoots and will allow you to get very close to your Model when the feature is activated. KNOW how close your camera can get to its subject while remaining in-focus, and don't exceed those limitations.
With all that said, most Point & Shoots will work fine as long as you know how to use them and are doing so properly. Always read your manual! It will provide good camera specific information that you need to understand.

Now I'll touch a little on DSLRs. If you're interested in photography aside from snapshots of your LEGO models, you may want to look into one. However, if you are unfamiliar with how to take a photograph manually then I would recommend you purchase a used 35mm film SLR and learn the basics from there. 35mm film and equipment can be had very cheap, and older equipment is very reliable! The less electronics, the longer it will probably last - I have cameras from the 1920s in perfect working order. Some people like to think film is more expensive than digital but they ignore the low cost of older and used SLR bodies and the high cost of DSLRs that will probably be in need of replacement much quicker.
Regardless, if you know about exposure and manual controls, and have access to a DSLR you can take very good photos of your LEGO models! More control over image taking will result in you being able to respond to different situations much easier. You will have access to Exposure Compensation as well as Manual Exposure and proper White Balance controls. If you are shooting your models on Manual, make sure your aperture is set to a relatively high f/stop to make sure all of your model is in-focus. It depends on the model's size, your focal length, and how close you are, but you don't want to be shooting any more open then f/5.6.
Many of the things I said about Point & Shoots applies here too. Sensor size is much more important than Megapixels. DSLRs are slowly becoming fitted with Full-Frame sensors, which is fancy terminology for saying they're finally the same size as 35mm film. Most DSLRs still have APS sized sensors, so again 6mp will do just fine. Don't overspend for features you may never need or use. 
When choosing a brand, know that they will all perform splendidly. Don't listen to anybody saying one is better than another, they're speaking out of their rectum. Consider if you have any old lenses, if/how they can work with a modern DSLR, the selection of lenses the company offers (will they suit your needs?), compatible flashes, what type of memory card (all mostly CF), but MOST importantly - how does it feel in your hand? Go to the store or find a buddy with one and feel them out.


That ends Week 1 of LEGO Photography 101. With all luck I'll move on to our next topic next week which will be the shooting environment!

Friday 29 August 2008

The Hundred Days

Vive le Masoko Tanga! This blog has been defunct for quite sometime now, I was hit with school, work, something of a social life, and a general dim age has descended upon my hobby of LEGO building.  Tom may actually be dead. Well, who knows, perhaps he might strike at the flanks with a well prepared article. Enough talk, I move to the point of this post, and a most glorious point it is - to restore Masoko Tanga to its previous prestige!

Lukas, a Young Spacer who unlike myself still qualifies as a TFOL, has advanced his skills far passed what they were when he started building. I've known him loosely since he came to the Classic Space Forums - I've always been a relative outsider, and my inability to attend festivals will leave me to this fate more or less indefinitely.  I've always held Lukas in high regard, he never becomes egotistical about his skills, never lowers himself to blatant elitism, and generally tends to avoid internet drama - skills which seem to be lacking in the general Space community these days. So I sat down at my computer today and had an interview with him! I know he was recently interviewed by LAML, so I tried to ask questions that weren't of the basic and obvious variety.
 Now, in the last couple of years the demographics of the LEGO community have really changed. Back in 2003, you could refer to the online community as the AFOL community and it would make sense, the majority if not the entirety of the community at places like LUGnet were adults. 
"The starting group in toy chat rooms, LUGnet, and ultimately Classic-Space was started by men pretty much over the age of 30" says Lukas, "I think that the age demographic of the more intense LEGO community declined as time went on. ... along with a burst of internet activity, young people joined in". LEGO has and always will be targeted at the young audience, so its not as if the fans don't exist. By the time of LUGnet many younger fans were even online, as Bzpower is an example of, and smaller forums like Saber Scorpian's. But the group isn't the same as those, today there are many younger fans who show the same level of skill and effort that was previously only possessed by AFOLs. 
"We weren't aware of this more intense way of building until we were old enough to get on the internet and realize we could participate too". I think the last part there is ringing on a greater truth. At the start of my online excursions, settled into the Lego General section of Bzppower forums, I became aware of the AFOL .Space (who were not yet on Classic-Space); it never really occurred to be that I could join them, at least not at that stage in my building skills.
Lukas also came from a smaller community of younger builders, "I think it helped me ease into the serious building". There's a certain change that occurs in the mind of a LEGO fan when they discover a trove of people online who share the same passion, and another more significant change when that group is weeded out of those who will move on from LEGO once they pass the target age; "I realized how much people really cared and how much work other people put into the hobby".
There is also something to be said about coming from such a community and how it plays out upon a builder's skill and attitude, "if I had hopped right into Classic-Space, Classic-Castle, [or] the higher up forums it probably would have been more of a shock, and might have turned me away from the hobby". While harsh criticism is the best way to improve skills, sometimes it does a lot of good to be grounded with others around the same skill level.
"It also gave me a feeling that some people are very stuck up.... The high standards go both ways". There is often a thin line between tough love and though.  Sometimes the though love is needed, sometimes just the though, and other times neither. Its a situation that is dependent upon both sides as to what is needed. When I finally immigrated to Classic-Space forums I knew that I was going there for harsh and real criticism, of the kind you can't get there today. Such, I was not deterred when my first handful of models were largely dejected. Still, I was putting forth my best and hoping to make it better.
"People should put their best foot forth. ... the models that they have worked on the most and are most proud of" says Lukas, touching on the hierarchy of builders within the community, "some people reject all people who, while [they] might have incredible ideas or techniques, may not be able to make a spaceship with a consistent colour scheme". Luckily in my stay at Classic-Space there was no rejection of community members and I received the 'tough love' I needed.
"I still poke my head into both the higher-up and the lower forums, just so I can get the best view, I suppose".
Another recent change to the community was another migration. Just as many members left LUGnet and splintered into separate forums, many members are using flickr these days to host images of their creations and to interact with the LEGO community. 
"I still dislike thinking in terms of better and worse builders, but it does exists, and a forum where any builder, no matter how inexperienced [and] no matter how many years of grammar can join, things will go downhill eventually. This is one of the reasons why I enjoy flickr so much" that is, the ability to control who you are dealing with - while at the same time being part of a community with such a large pool of members, new and old.
"It makes it easier for new people to join, .... and with such a web of users, new people can quickly find experienced builders and learn from them". Whether or not flickr has the longevity that no other community site has achieved, remains to be seen, but it seems to incorporate a lot of features that people longed for in the sites of old.
We then moved to questions involving building. This blog has always had a soft spot for Microscale Space, so I kept the questions focused. Microscale has risen anew in the last couple years to heights of prestige never previously enjoyed. It seems like such a specific genre, but in fact it is the most open of any building style.
"Once you toss the minifig out the window really anything can be made.... it lets extraneous parts get unique uses and doesn't destroy my collection. It also allows for a myriad of unique shapes unrestricted by gravity or that pesky thing known as 'common sense'".
Why then did it take so long for Microscale to become an established and popular style? Before builders like Mike Yoder or Jerac came along, microscale was relatively obscure and the only models that enjoyed celebrity were those of Paul Baulch. 
"It just goes with the ebb and flow of building styles and fads. I feeling it fading a bit nowadays but that's fine. MICROSCALE WILL STRIKE AGAIN". Hah. Perhaps it has something to do with the fascination many AFOLs had during the LUGnet period with producing SHIPs. When you have enough parts to create big ships that fit with minifigs, microscale doesn't even begin to enter the equation. However, as mentioned earlier there was a great rise in the number of serious younger builders - who undoubtedly had much smaller collections than AFOLs and therefore couldn't produce SHIPs. 
I dared to dive into the builder's mind and clarify a few details about the thinking process that goes into creating a model.
"Generally when I get an idea it comes in shape form, then I decide whether that should be in microscale or minifig scale" he admits that occasionally this process is reversed. I know that I usually separate my scales and sit down with the intent of building in one particular scale. However sometimes there will be a shape or a configuration of parts that will get me thinking abstractly, and scale is left in lieu until I reach a part that grounds it.
"Depending on my collection and how some parts work out, details may change but for the most part I get my idea out there the way I wanted it to be.... if it doesn't end up the way I planned you don't see it" for the most part, he says. Working abstractly can be good, but it also can end with wasted time and effort.
I moved onto the final topic I wanted to question Lukas on, and that was the photography of LEGO models. Is it really so important to properly document your model?
"Immensely. Sure a poorly photographed but amazing model will get known eventually, [brickshelf user] kero40 for example, but good photography makes the model the star of the show, rather than your dirty laundry or the gritty background you chose, and that makes the model more appealing". There have been a few attempts to educate the masses how to do this simply, I know because I've written a few of them and hope to publish another here on MT soon, but perhaps education through suggestion isn't enough?
"A few contests of late have required decent photography, which I think is a good rule" and here I tend to agree. For the sake of the builder, nothing can compare to seeing a model in person, so good photography is very important in giving your viewer the best impression.
"Good photography should bring out the depth of the model, but when you can physically move yourself around it you get a better sense of where parts of the model are in relation to each other" this means that bad photography is going to seriously detract from a model and undermine it's success with the community as a whole.
So how does Lukas photograph?
"I toss a sheet of poster board up against something in natural sunlight. I own a nikon D40 DSLR camera which I take the pictures with and then I touch them up with Photoshop CS3". Now, not everyone has access to CS3, but I know many a good photographer who makes due with the plethora of free options floating around the internet.
With that we brought the interview to a close and Lukas left to attend to other business, but I hope this article has touched upon atleast one subject that has been the musing of your mind and that you'll continue to read as Masoko Tanga turns a new leaf and hopefully puts out many more such articles before she keels. 

Friday 11 April 2008

Jupiter Jazz; Q&A with Nnenn

It's been a while since the last interview so here's a brand new one to sink your fangs into!

...
Tom: Well first of all thanks for your time Nnenn, we're glad to have you here at Masoko Tanga. Browsing through your creations one of the things that strikes me is that you're not afraid to experiment with colour schemes. I can see bright blues and oranges, lime greens and even some neon parts amongst many others. Do you have a way of picking a colour scheme? Just a random selection from parts lying around or a process much more complex?

Nnenn: My colour choices are a mixture of randomness and some level of expertise. I've taught enough college art courses to know that red/yellow/blue aren't the primary colors, browns/tans are mostly dark and pale oranges (so blue/teal compliments work well with them), colors are most intense at completely different values, etc. etc. But I'm also old enough to have seen color trends in fashion, design, art, or wherever, swing all over and come full circle; so there is a lot of subjectivity involved, it's really nothing more than current opinion. I always chuckle when I see someone comment about how 'those colors don't work.' So mostly, randomness can be effective... heck, rainbow schemes work if there is some intelligent hierarchy involved.

Tom: Are there any colours in the Lego parts-spectrum that you detest?

Nnenn: No colour, and few schemes, are detestable... so I don't mind rare Lego colours popping up, unless it's at the expense of something that could otherwise round-out a regular colour's part palette.

Tom: How much planning would you put into an average Moc? Do you rely on scribbled notebook sketches and L-Draw designs to test the waters or do you prefer to start out with just an idea in your head and a few bricks in your hand?

Nnenn: I almost never plan a model beforehand, though on rare occasions I'll do a 10-second sketch of something that pops into my head so I don't forget the basic shape. Mostly, I start with no more of an idea than 'large spaceship, fighter, mech, tank,' or whatever. Sometimes I just play with a few pieces to see if they can be arranged together into some fluid but dynamic form; I'm often surprised with the results (seriously)... I often think: 'wow, I couldn't have thought of that in a million years.' When teaching creativity, I usually stress working in the moment and letting go of preconceived notions; results that happen spontaneously are usually far more interesting that those that stem from careful plodding. However, notice most of my builds are not overly large... something that does, in fact, take a good deal of planning due to engineering considerations, time, parts, etc.

Tom: You've got a fair bit of theme-variety in your galleries but you're of course best known for your Space creations. Are there any themes that you've never built for that you'd like to experiment with in the future?

Nnenn: Although I enjoy the tangible process of connecting bricks at my whimsical discretion (read: playing with Lego), I am really fascinated with space themes in general. The combination of these interests seems ideal right now as I view both with limitless creative possibilities. But no, if I was restricted to building only themes like town, castle, steampunk, etc. I would probably sell my collection.

Tom: You mentioned ideas popping into your head, what builders inspire you?

Nnenn: Unusually perhaps, but the better builders don't really inspire me per-se, I note their technique and finish but their models are done well enough that my imagination sees little room for improvement. What gives me an immense amount of inspiration (and motivation) is seeing really poor, amateurish creations on Brickshelf.com. Kids don't have the conventional constraints that adult minds feel necessary; hence, all the really wacky designs out there that we instinctively scoff at... but if George Lucas, for example, were to add some polish and fly it through the right setting, suddenly it's totally believable.

Tom: Now you've gained much notoriety for not being afraid to experiment with clone bricks and other Non Lego items. What's perhaps the strangest Non-Lego item you've ever incorporated into a Moc?

Nnenn: I've always felt that rubber bands are really odd things to include in creations: they're tactilely opposite of bricks. But actually, there hasn't been anything really too strange... that's yet to come. I plan on building a big wooden frame to hold a really large ship; it saves me from having to deal with substructure engineering, something which I could not care less about, and focus on the aesthetic design. Lego does this sort of thing all the time but I'm sure a few 'dedicated purists' will be snippy about it.

Tom: And lastly, out of all your creations do have a favorite and for what reason?

Nnenn: I'm notorious among those that know me for not having favorites... for anything. But I usually feel whatever I'm currently working on is the most amazing thing ever, then after a few days (and pictures) later I look at it and wonder what I could have possibly been thinking... so I start something new to compensate.
...

Many thanks to Nnenn for the great interview! Nnenn's work can be viewed at either Brickshelf or Flickr whatever your fancy.
Now be sure to join us at the same bat-place and same bat-time next week when I'll be back to the usual irrelevant ramblings and communist propaganda that you've grown to love/ resent.

Sunday 23 March 2008

Domain Switch

Just a heads up, my current website at masokotanga.unicornbreak.com will soon no longer be mine, I'm moving to bren.brittwilson.com. As such, this blog has been moved simply to masokotanga.blogspot.com.

Thanks all,
The Management.

Saturday 22 March 2008

The Dead Flag Blues

I'm afraid I'm becoming so terribly busy this year with school, work, art and photography that I've entered what is best described as a "controlled dark age". A sad realization, but one I cannot get around. My March Break consisted of more work than any normal week, so I had no time to build what-so-ever. Fact is, my LEGO bricks have been loitering in my closet since October. With any luck, I'll have sometime in the summer - but that could be wishful thinking. I continue to browse brickshelf and flickr, so don't think I'm going anywhere. Although, I've grown a little disinterested in CS.com, and my only forms of criticism will come from either here or flickr.

So today's review is one a recent Nnenn creation, the MB-4 Vauggen. This Messerschmidt look-a-like is pretty typical of Nnenn's style -- which can usually be separated into two categories, the crazy awesome spacecraft [example], and the crazy awesome and built after a theme spacecraft [example]. This falls into the latter category. If there is one thing that Nnenn knows how to do, and there's actually several, it's shaping. The rigid forms on the MB-4 give it this retro-robust-industrial look that gives the ship an entirely different feeling than if it had been rounded with spindly antennae. This rigid look makes the airframe feel solid and strong, this fighter isn't a delicate little pansy ship, it'll kick your ass.
So another thing Nnenn does very well is decal design. Most people when they find a skill they are good at, latch on to it like a parasite and bleed it dry. Where is this going? Nnenn demonstrates here that he can still make beautifully emblazoned ships with just the brick alone. This allows an otherwise flat and boring surface to become a point of visual interest, and being brick built we can assume that a little more forethought might have gone into their placement. Another technique that breaks up the flat surfaces of the MB-4 is Nnenn's use of multiple grays. Many people were disgusted and appalled when LEGO introduced the "new" grey (or 'bley'), but I really think it's opened a great door of opportunity for builders - the look Nnenn (and many others) has created with this multi-grey affect would never have been possible before; except perhaps with extensive use of clones, which will probably never catch on with the community at large. If the MB-4 was all one grey, it would still be great, but the monochromatic variation really adds a great realism to the model.

So don't miss Nnenn's MB-4 Vauggen. Adore, study, and copy its various effects into your own repertoire.

Friday 15 February 2008

Heretic Pride

Yes I know, updates have been sparse as of late and it's oh so uncool to beat that proverbial dead horse about it every time. Rest assured, they'll be no equine beating 'round here anymore as we have no horse left to beat. The last time I saw the Masoko Tanga horse it resembled a styrofoam tray of supermarket mince-meat. I thought for today I'd try something different, so I present to you my adventures with "the-Shelf's" random folder button and my discoveries both good and weird.

I found this rendered TA-138 German Jet Moc which is quite lovely. I myself have tried building fighters based on similar design but have met with no success as I could never get that weird barrel shaped fuselage right. The no-frills wings look fantastic, a great rhombus shape with no fancy crap to spoil. From the same historical vein there's this German Flak cannon, its extraordinary level of detail and accuracy actually classifies it as gun-porn. It's a shame half the pictures are so tiny. This tiny VTOL craft is pretty fancy looking but I think its lack of bulk brings it down. Particularly in the turbines, they look great at first but they don't hold up to close inspection. I much prefer the engine cowling design on this other VTOL craft that I found. Sure its not exactly sleek and streamlined but it's a good example of innovative parts usage. The ski-feet landing gear apparatus is adorable. This Phantom chicken walker may not have cute feet but it makes up for it by looking totally bad-ass. Though I can't help think that the poor lighting maybe strategically masks a few design faults. Regardless, I really love those jet engine looking things and the antennas.

Have you ever found yourself watching Revenge of the Sith and wishing for a tiny horribly burnt, scarred and limbless ABS Anikan to clutch in your sweaty palm and stroke reassuringly? Well just enclose your cherished Anikan minifig of choice along with ten dollars USD in a self sealed envelope care of B-Shelf user Legomanics and he'll do the rest. Your Anakin will be crafted with the finest of dollar-store cigarette lighters and even comes included with a certificate guaranteeing depreciation. And according to Keika03 "if Anakin was still Anakin, the galaxy would be.." something like this rather cute little viggnette. Good to see that under good-Anikan's rule Galactic sanitation, public transport and public time-pieces are supported.

Here's a great L-Draw model of everyone's favourite trundling death machine, the mammoth Tank. It's the version from that one Command & Conquer game that every one forgot about that's actually pretty good. Those slanted windows fit well and the way those arches curve over the shoulder and hip joints is simple yet really quite effective. Nice toe-hydraulics too. No matter what anyone says it's a true fact that we all need a strange robot walking cat at some point in our life and and anyone who says they don't lacks a soul. However it goes without saying that said robot cat lacks whiskers, an esential part of any cat be it organic or arterficial. If robot cats aren't your kinda thing maybe robotic spiders are more your kind of thing? Bounding straight from arachnid to Marsupial we have a robotic Mech Kangeroo by B-Shelf citizen Izzo. I get a feling of Deja Vu from this Moc like I feel like I've allready talked about it here and before. I just don't know, maybe I'm loosing my mind and tomorrow I'll wake up and my walls will be white and padded. Next there's a cool Alien head that looks like it has dentures. Despite being limited to a diet of mushy-peas this alien is quite cool just like this rather funky and poseable bot. Take note of the swept back robo-hair style. Here's some wheels for you whether you like 'em modern or steampunk and I adore this odd-fighter. I think it's the weird round orb-y cockpit shape combined with the cool wings that does it. Lastly, I discovered this really cool piano and an L-draw render with possibly one of the worst names of all time. Prove me wrong folks.


Sunday 13 January 2008

Maybe You Can Owe Me

Wow. So I'm putting in my applications for University and College (for those state-side, they're two different types of schools altogether up here) and suddenly it's dawning on me that things are going to change a lot and soon. While I don't have to go through any stressful single life-determining test like Tom did, they still don't make your last year of high school any easier; I don't foresee any building from me until summer and depending on where I'm going to be calling home next year, summer could be optimistic.


Today's feature is from Adrian Florea. Any space builder probably knows that Homeworld and it's sequel(s?) are prime inspiration for the community and many play the game religiously, and even those who don't still know more than they should about the various ships. Today Adrian (or Olog) brings us his Vaygr Bomber. At first look I actually thought he was posting more concept art, his photos have been done to mimic the colour scheme and organisation of the art. One aspect of building that is being experimented with more lately is this concept of crowded colour schemes that work. We all know what a rainbow warrior looks like, and that's not what these are. It probably got a kick start when Peter Morris' work starting getting attention, and then when he finally joined the community - from there various builder have been tooling with the idea that colour schemes don't need to be as rigid and clean as they usually are; no longer builders fear throwing in elements of random colour! Of course, I'm not recommending that you start tacking on colours at random, some thought still needs to go into this. Tim Z (Spook) has taken on the idea and executes it quite nicely, his building style is very akin to the concepts of Homeworld - which is where this dirta-chrome idea probably took off from originally.
Back on topic, Adrian comes through with this idea and what you get it something that just doesn't resemble LEGO bricks until you look for studs. His repetition of the zebra stripe likes to play funny tricks with your eyes and instantly gives the model this bizarre sort of dynamic unity of form - it's like a weak optical illusion that you can't stop starring at. The jagged edges and red pontoons(?) keep the entire form contained and definitely add a deadly look to it.
On top of this, I think he took the photos outside: and it looks pretty cold. What dedication.